| Rolling pin art
submitted by Patricia K. Wesley of Shadynook Care Center on December 20, 2006
Size of Group: 4 or 5
Equipment: rolling pin, white paper or watercolor paper, paint brush, non-toxic paint, optional hair dryer
Description: Provide paper, paint, and brush to participants. Place paint dots on paper and fold paper in half. Use the rolling pin and roll over the paper several times. Unfold and the painting is revealed. A hair dryer will speed up the drying process. Hold pictures up for discussion. Mat and hang.
Notes: You will be surprised at the creative process it allows lower cognitive residents. Completed art work in 5 to 10 minutes. Starts a discussion on what they see in their picture. It can be anything they want it to be. Accept the art work at its own merit. Non-controversial. Use or rolling pin by participants provides physical movement opportunities.
Christmas Ornament made with Puzzle Piece
Submitted by Cindy Laverty of Nursing/Rehab Home ON 10-26-13
Size of Group: 1-6
Equipment/Supplies Needed:
green paint
brown paint
puzzle pieces
glitter, green gold and white
mardi gra necklaces (small beads)
hair spray
Activity/Treatment Objective or Expected Outcome:
To make a Christmas ornament for themselves or family.
Eye hand coordination.
Creativity.
Great group project and working together.
Description of the Activity: Glue puzzle pieces in shape of a tree or a wreath. Paint green for tree. Brown for the bottom of the tree. Cut apart the necklaces. Glue the different color beads on the tree. Add glitter and spray with hair spray at the end to hold every thing on. We did this as a group project and made 20 ornaments.
Butterfly Collage
submitted by Laurie Solomon, RT of UCP Bayville Inc. on March 9, 2007
Size of Group: any
Equipment: Large Paper, Paint, Paintbrushes, Glue, Glitter, Magazines, Scissors, Tissue paper, Beads, Pipe cleaners, photographs of activities that your consumers have done in the Spring, and any other materials you wish to use.
Objective: This activity will give your consumers a sense of accomplishment and will teach what outdoor activities, and holidays that can be done during the Spring.
Description: Look for photographs and pictures in magazines of any leisure activity that has been done during the Spring. Cut out a large Butterfly and paint it with spring time colors, glue the pictures that you chose on the butterfly. Any extra space decorate with tissue paper, beads, glitter, or any ideas that you may have. Take the pipe cleaner and use that for the antennas.
Create Greeting Cards (The greeting card company)
submitted by L J Lewis on May 11, 2007
Size of Group: Varies Various activities in one On-going
Equipment: Paper, Pens, Pencils, Watercolor pencils, cups of water, notebooks for the poetry, water color paper, and other supplies as needed, glue, glitter, small pieces of ribbon or other embellishments and other items to make a card template to be printed numerous times on a color copier. Computer and color printer and copier. glue.
Objective: Patients will thrive on the idea of creating something. Increased socialization through the activity. Fine motor skills as well as gross motor skills as some may walk to get other items needed in the room will be utilized and developed. Hand eye coordination.
Expected Outcome: Patients or residents will be come motivated from within themselves to do a tasks. There will be a sense of pride for the end result and accomplishment.
Description: This would allow the patients and residents to practice a number of skills while contributing in a positive manner to the community in which they live and reside. In essence the whole idea is to create from scratch quality templates that can be sent out for printing perhaps on a color copier. The cards designed and processed by the patients and residents of the facility. The poetry and sayings should be original and come from the patients and be donated by the staff--if willing.
The artwork should be donated by the staff and patients or residents also and used to create lovely cards that could then be processed by scanning artwork into a computer. Using the computer the two mediums could come together in a fashion and arrangement to form a card template. That template can then be used to take to a printer or to a color copier of high quality off campus to be copied. If any embellishments need to be applied the cards could then come back to the residents and patients for this process. This would be the adding of little bows or leather or little pieces of twine or glitter and etc. to the cards to make them more original. The final product could be checked by quality control specialist in the group. Then they could be packaged and sold in a place on campus for a nominal fee. The purchasers could be patients, residents and staff. There could be a patient price and a staff price. Cards could be sent to anyone to brighten and individuals day from whom ever purchased them. This could be a year round project for about an hour on certain days of the month and could provide seasonal acknowledgement by the residents or patients.
Skills and benefits involved in this project may include the following but not limited to these:
Fosters individual creativity,
Provides a sense of hope for the future, Poetic skills in writing, Focus, Art skills, Craft skills, Fine motor skills, Hand/eye coordination, Skill of analysis,and Color coordination and creativity with use of color and other skills and benefits
Recipe Scrapbooking
submitted by Lisa Porco Planting of Great Northern Nursing Centre on May 26, 2007
Size of Group: 1-1, or small group
Equipment: paper, pen, computer, computer printer, camera, scrapbooking supplies
Objective: The main objective of this program is to encourage residents to reminisce and share their favorite recipes, to share stories about cooking for their families, and to compare their recipes with others. The expected outcome of this program is a true sense of pride in themselves and their past cooking experiences.
Description: In small groups, or one to one with residents and family members, have residents bring in their favorite recipes from home or recite them to you. Collect the recipes, as well as a little story about how the recipe originated, or a little story about the residents' family, how he/she immigrated to Canada, how long they have been married, how many kids etc. Ask a family member to bring in a picture of the resident, or take a new one to include with the recipe and story.
Once everything has been collected, and you have enough for a cookbook, compile them into a beautiful scrapbook of recipes and stories.
This project can be very cost effective with the use of clip art, or dollar store scrapbooking supplies.
In our nursing home, some residents were able to submit their own hand written recipes, which gave it an extra special touch.
On the backsides of each page, we photocopied old newspaper ads that we found at the library showing old local stores, products, and prices.
The residents really enjoyed working on this project, and are enjoying the finished product even more!
What's nice also, is that these scrapbook recipe books can be sold in chapters, because after seeing the first one, it will really encourage others to participate!
Antique Collage
submitted by Andrea Stockton-Barton of Baywoods of Annapolis on October 4, 2007
Size of Group: 5 to 6 individuals
Equipment: Antique magazines, mod podge, glue, heavy cardboard, scissors, picture frame, odds and ends i.e., buttons, lace, fabric, ribbon, etc.
Objective:
* Concentration and focusing skills
* Reminiscing on bygone items used as functional items and for decorating
* socialization
* the acquisition of craft skills
* self esteem and feelings of accomplishment
Description: Give each resident 1 to 2 antique magazines and ask them to find items that are interesting to use in the collage. Encourage residents to talk about the items and if they remember owning any of the items when they were younger. Have residents cut out the pictures and then arrange them in a pleasant design on the board. We typed various categories i.e., toys, watches, clocks, rugs, paintings, quilts, etc. and placed the words next to the groupings of antique pictures. We then glued down our pictures using additional items such as antique lace, buttons, pieces of fabric, etc. to give it a distressed or antique look and sealed the entire collage with a layer of decoupage. After the picture was left to dry for several hours we placed it in a decorative frame with all the names of the participants typed on a decorative tag at the bottom of the picture(designed and completed by...) We now have it on display and have received a lot of positive feedback from staff and visitors.
Clip Art Mask
submitted by Parker Ceplina of Nursing Home on August 14, 2009
Size of Group: ? (how much help you have/focus of residents)
Equipment: Computer,
paper,
card stock,
Markers/Crayons/colored Pencils/Water colors/etc., Glue Sticks, Tongue Depressors/ Wide Popsicle Sticks
Objective: fun, personal satisfaction, sense of accomplishment, social interaction
Description:
1-Print black & White clip art animals with eyes easy to cut out
2-using a copy machine copy masks onto card stock
3-give to residents to color they want
4-depending on the state of resident give them scissors or you cut it (be sure to cut out eyes!!)
5-Take tongue depressor and apply glue to the top and stick to back of mask
Paper Mache Pumpkins
Submitted by: Jennifer Haar, ATR, AD, Activities Director at Destin Healthcare & Rehabilitation Center in Destin, Florida
Size of Group: 8-10 Alert Group
Equipment: 5 Medium size plastic bowls; water; flour; 5 mixing spoons;
newspaper; 8-10 balloons (any color); toilet paper rolls (or paper towel
rolls); Styrofoam plates; orange and green paint, brushes; rubber gloves, masking tape.
Objective: Personal satisfaction; Sense of accomplishment; Socialization
with peers in a group setting; Reminiscing; Ability to follow step-by-step directions with demonstration; ability to work together.
Description: This is a two-part project. Prepare activity before presenting
it to the group. Begin by cutting cardboard rolls about 2" in height. Next, shred newspaper in half by crease, then lengthwise to make a bunch of strips. You are now ready to present your items in front of the group. Display the items in the center of the table for the participants to view. Begin by introducing the theme: Pumpkins! Ask them if they've ever gone pumpkin picking when they were a child. Ask how big the biggest pumpkin they picked was. Now, introduce the project. Tell them they will be making "Paper Mache Pumpkins" today. Have each participant put on a pair of gloves as this is a messy project. Explain that you will be blowing up a balloon for each participant as the base of the pumpkin shape. Now blow up the balloons and place each one on a Styrofoam plate. Next, add the pumpkin's stem by taking 1 cardboard roll and taping it over the balloon tie. Make sure the tape covers the hole. Now tell them they will be using just flour, water, and newspaper for this project. Pour 2 cups flour to 1 cup water, in each of their bowls. Ask them to stir it until it is thick and pasty (no lumps). Add more/less as necessary, making sure to keep that semi-thick consistency. They will enjoy this as it may remind them of baking. Next, present each participant with a bunch of strips of newspaper. Demonstrate the process by dipping 1 strip of paper in the glue mixture, soaking it up thoroughly. With your left pointer and thumb fingers pick up one end of the gooey strip. With your right pointer and middle finger, slide off the excess glue mixture from the strip. Place it smoothly on the balloon. Ask the participants to now try this. Have them cover their entire balloon, making sure they also get the stem covered as well. Repeat the process, giving it a second coat. (This will make the pumpkin more hard when it dries, making it easier to paint afterwards). Once every part of the balloon has been covered, take some more glue mixture and smear it around the pumpkin, making sure it is covered, but not too drenched.. This will take about 2-3 days to fully dry. After the first day, turn it around to get the bottom dry. Once it's all dry, the participants then have the opportunity to complete their pumpkin! Have them paint it orange with a green stem for a November activity, or for Halloween, have them paint a jack-o'-lantern face with black paint. Make sure the orange paint is fully dried before applying the black paint, and always remember to enforce process, not product. A lot of residents may be self-conscious about their final product, but it's the process and their participation that matters. Once the pumpkins are completed and dried, display them as centerpieces for a Harvest Festival at your facility! You can buy ivy from the dollar store and decorate around the pumpkin for an autumn scene.
Scrap booking (for Dementia patients)
submitted by Sherry of Elmcroft on September 24, 2006
Size of Group: any size
Equipment: Construction Paper; tape; pictures; hole punch; scrap
yarn or metal ring binders
Objective: Helps the residents to recall family, friends, foods,
colors by pictures and labels.
Description: Different colored construction
paper cut in half and punch a hole on top or side of page so
to make a booklet
style format. Then cut pictures of the resident's favorite foods,
color, family members, friends, past jobs, etc and then paste,
tape, staple the picture to the construction paper. Underneath
the
picture put a caption like Best friend, my high school, my favorite
team, etc. This way they can frequently look through the album
to help remember facts. Keeps their minds sharp. If you have
the resources then you can laminate the pages when finished.
When family members come they enjoy going through the
picture book with them.
Let's go Fishing!
Submitted by Atara Engel; TR Student, Concordia University on
September 01, 2004
Size: Any number of clients [works best with children]
Equipment: Different colors of construction paper, scissors,
glue, colorful supplies to be stuck on fish [sparkles, confetti,
cotton balls, feathers, plastic eyes, sequins, wood chips,
shiny paper, etc.], string or ribbon, short sticks or plastic
rods, magnets/magnetic tape, paper clips, markers/crayons/pencils.
Objective: The goals for this program are
hand-eye coordination, focusing on a task [using patience...the
fish are difficult
to catch!], using dexterity and fine motor skills [cutting,
pasting, drawing, ""fishing""], social
interaction, matching, learning shapes and sizes and colors.
Description: Clients will use
construction paper in the color of their choosing and will
use scissors to cut out fish in
different shapes [fish may need to be pre-cut depending on
clients]. Clients will then use glue and art materials to decorate
their fish as they choose. When each client is done, a paper
clip is attached to the fish [magnetic tape may be more effective
if fish are heavy due to excess art supplies!] and fish are
placed on the floor. Clients are given a stick, some string
and a magnet to make fishing rods [these may need to be made in
advance by tying string to the end of the sticks and tying
a magnet to the end of the string]. Clients can now ""go
fishing"" and catch their creations! This activity
can also be made more difficult by pasting letters or pictures
onto the fish and having the clients try to ""catch"" a
matching-pair or fish.
Airplane Fun
submitted by Cheryl Halladay of
Devon Health Centre, Devon, Alberta on June 25, 2003
Size: 8 to 12
Equipment: Old
sheet with various holes cut throughout it and scores marked
above the holes. Some holes I marked "Miss a turn, sing
a song, etc. I had them each make their own paper airplane and
name it. e.g Furious Flyers. I attached string to the top of
the sheet to hang it from the ceiling.
Objective: Object:
To fly their paper airplane through the holes and score the
most points!
Description: I
divided my group into two teams, however you could do this individually
and they could compete against each other. They then took turns
throwing their "planes through the holes and scored. It
was thoroughly enjoyed by all, but the men particularly enjoyed
it.
Butterflies
Submitted
by Laurie Solomon, RT of UCP Bayville, inc. on October 16, 2000
Size: 5-10
Equipment: Markers, Coffee
Filters, White Paper, Water, Spray Bottle, Hair dryer, Pipe Cleaners
Objective: Increased self
esteem and accomplishment, especially those who do not have
good hand coordination.
Description: Put the coffee
filter on top of the white paper, you may need to tape it
down.
Take the markers and color the coffee filter any way they want.
Spray the now colored coffee filter on top of the white paper.
Use the hair dryer to dry it. Each person makes two coffee
filters.
Fold each one like you would a fan. Connect them together with
pipe cleaners. Use another pipe cleaner for its antennas.
Photo Puzzle
submitted by Ellen Stoneberg
Instead of using children's puzzles
or ordering the puzzles of photographed people form a catalog,
why not make your own?
Supply list:
mod podge
photographs of residents to be enlarged on color copier
spray adhesive
blank 12 piece puzzles
scissors
copy machine at your work
Blow
up a color photograph (of a resident at your facility) to 11'
x 7 1/2" for about a dollar at a copy center. Take a spray
adhesive to attach the image to a simple 12 piece puzzle. You
can buy the spray adhesive and the blank puzzle at a large art
supply store.
Photocopy the BOTTOM of the puzzle
on a copy machine. then using a small dab of glue stick, on
each piece on the photocopy adhere it to the back of the color
photocopy and center it accordingly.
Cut out the pieces carefully using
scissors. Separate the photocopied template from the color copied
image. Then take each color copied piece, and individually spray
the adhesive onto the piece to be glued.
Then to protect the whole puzzle,
paint each piece with mod podge to give it a protective coating.
This process make take a little time, but it makes a custom
puzzle for an Alzheimer's or dementia resident for very little
cost.
Paper Mache Box
submitted by Lauretta Kaldor on December
20, 1999
Size of Group: 6-8
Equipment: PVA glue mixed
with water 50%, scrap paper, small card box that holds eight
tea bags, poster paint, brushes, varnish
Objective: make a small
paper mache box to hold pens or nick - nacks decorated with
poster paint and finished off with a clear varnish.
To experience an opportunity to make and create.
To develop an awareness of ways of recycling packaging and paper
Description:
1. tear paper into strips
2. immerse each strip into glue mixture and paste over outside
of box until all outside surfaces are covered.
3. allow to dry and repeat twice making three layers of decoupage
on the outside.
4. cut out a square of paper to cover bottom inside of box.
5. paint the outside and inside with bright poster colors and
allow to dry.
6. apply varnish
|
|
|
MATISSE
Submitted by Eric Johnson |
Check out some books at the library
on Matisse. Show the clients copies
of Matisse cut-outs from the books. Talk about color and shapes.
The object is to encourage the clients to create their own cut-outs
using the same style as what Matisse used - only relating the
shapes and colors to their personal experiences or feelings
or goals etc. A good way to start this project is to ask the
participants to write 5 positive characteristics and 3 not so
good characteristics on a sheet of paper. It is from this list
of eight words that the clients would create their cutouts.
The cut-outs would be a sort of character portrait.
I have had much success with this
exercise. It takes minimal supplies: many colors of construction
paper (bright colors if possible) glue stix, poster board and
imagination. Time: approximately. 2 hours to complete the project.
Kids especially love this art exercise
and they also love to describe the meaning of their work to
others.
 |
COLLAGE
IDEAS |
We all seem to use collage in Rec Therapy
programs. Here are a few collage ideas. The treatment or leisure
ed aspect of the program is left up to you.
THEMED COLLAGE- invite participants
to draw pictures based upon a single theme.... Christmas, space,
the 1940's, happy memories, pets, Valentine's Day, etc. Instead
of drawing the pictures, cut out pictures and words from a magazine.
HANDS- trace hands on the
paper. Have each participant "autograph" their name
in or by the hand.
FACES- If you have a cartoonist
on hand have him draw each participant's face on the paper.
Participants then finish the picture by coloring the face
and
even adding miniature bodies to the head. You can transfer
a silhouette of the face by having the participant sit their
head
near a sheet of paper on the wall and shining a light onto
the head. Trace the shadow of the head on the paper.
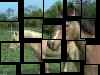
ENLARGEMENT- This is a great
idea which can involve many individuals
- Obtain a picture of an animal
(jungle scenes work great).
- Make a Xerox copy of it and
block the picture into one inch squares. On the back, number
each square in sequence. Make sure to make a 2-sided copy
of this picture. Now cut the copy along the lines into one
inch squares.
- Give each participant a piece
of that square and an 8 by 8 inch sheet of paper. Write the
number of the small square on the back of the large square
also.
- Instruct each person to transfer
and enlarge the picture from the small square to the large
square using black & gray paints. (You may use color markers).
- When all blocks are completed,
take the large squares and re-build it like the small picture
(using the numbers on the back helps).
- Tape all the pieces together
and you have a giant reproduction of the smaller picture.
Experiment with different pictures
and even with colors. In re-building the picture, your group
can focus on group work, cooperation, and communication.
 |
Torn puzzles |
Size of group:
2 to 12
Equipment: paper and makers,
crayon, or pencils
Directions: Invite participants
to draw a picture trying to use as much of the white space as
possible. When everyone's drawings are finished, have them tear
or cut the picture into an agreed upon number of pieces. For
lower functioning groups, 5 to 10. For higher functioning group,
maybe 25 to 40.
Have each person pass his/her torn
picture to another player who then tries to reassemble it. You
can make it competitive with the first to reassemble the picture
being the winner or non-competitive in which participants who
are having difficulty getting help from their neighbors.
Expected Outcome: You can
use this activity to facilitate discussion on leisure activities
(especially if you have participants drawing pictures of recreational
activities), to provide mental stimulation, to promote cooperative
skills (if puzzle assembling is done as a group).
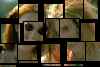 |
Jig
Saw Portraits |
Size of Group: up to 8
Equipment: camera, film,
cardboard, glue, scissors/art knife, puzzle patterns
Description: Have participants
take pictures of each other, individually or as a group. After
the picture is developed, paste picture onto a piece of cardboard.
Cut the picture into various size pieces.
Concerns:
- confidentiality- due
to confidentiality, some facilities may not be able to do
this activity as described
- safety- be sure to cover
safety basics when using and Exacto knife or other sharps
- photography- for facilities
with dark rooms photo development is not a problem. Overnight
or 2 day development can get expensive. Other services, though
cheaper take too long. Plan this activity keeping this in
mind.
Expected outcome: development
of a new leisure skill and interest in photography, socialization,
feelings of fun
|
|
Leaf Prints |
Size of Group: 1 to 8
Equipment: leaves with interesting
shapes or patterns, paint, brushes, sponges, paper
Focus: leisure skill development,
increasing repertoire of leisure skills, calming activity
Description:
- soak up paint with the sponge
and set it on a plate
- press the vein side of the leaf
onto the sponge
- place the leaf on the paper,
paint side down
- press the leaf carefully to
transfer the design to the paper
Suggestions: give participants
opportunities to improve their skills in paint transfers. Then
provide them with canvas panels or nice greeting card quality
papers. They can create their "master piece" on the
more expensive canvas panels or create many greeting cards to
mail to friends and family members.
Alternative: Rather than
using a sponge, the splatter method can be used.....
- place the leaf on the paper
- dip a little of the paint on
a stiff brush
- pull back on the brush with
fingers and splatter the leaf & paper
- a better method of splatter
painting is to take window screening and simply brush over
the screen with the leaf and paper underneath it.
Discussion: What activities
help you to relax? Explore your feelings during this activity
and check to see if you felt relaxed or maybe stressed. Did
this activity help you relax?
Expected Outcome: Participants
will learn a new craft idea and add to their repertoire of leisure
interests and skills. Participants will learn to use calming
activities to help them feel relaxed.
|

|
"Leather" Vases
Submitted by: Sheree
White of Winwood Hospital |
Size of Group:
1-6
Equipment:
- small to medium sized plastic
cups or bowls
- masking tape
- paint brushes
- light or medium wood stain
Objective:
- Pt will demonstrate increased
attention to task
- Pt will experience increased
self-esteem due to assured success of project
- Pt will demonstrate ability
to appropriately share space and materials
- Pt will learn new leisure skill
Description: Patients will
tear off masking tape in small strips or pieces and use them
to entirely cover the outside of their cup or bowl, overlapping
and crinkling the tape as much as possible along the way (the
more wrinkled the better). Then the patients will use the paintbrushes
to spread the wood stain all over the tape using thin coats.
Patients can use as many coats as they feel necessary. It really
does look like "leather"!
|